Neovim plugins with Fennel and Aniseed
Here you are, I was waiting for you. No, not you! You, just behind! I recognize you. No, don’t say anything, I’ll tell you.
This is your story
Now, remember… Remember that time when you were a little kid, staring at the blackboard in the classroom, not listening to any word coming out of your teacher’s mouth. Daydreaming, eyes fixed gazing in the direction of the board. In your head, that day, you were convinced that you had superpowers. You knew you could lift that little piece of chalk, with nothing else than your mind power. You knew you could, you just didn’t know how to do it yet. But it was just a matter of discovering The Trick. So you practiced, you stared at the chalk, focusing your mind, the hardest that you could. That shouldn’t be too difficult, because it was hidden in you, that energy, you just needed to be able to cast it in the right place. And so you tried, tried really hard to move that little piece of chalk. Unfortunately, that day, it didn’t work. But it didn’t matter, you’d try again another day. And an other day…
But it never worked… The truth is you never had any superpowers. That’s ok, you came to peace with the idea a long time ago. Now life is a little bit different for you. You had a few jobs, working with computers. Writing code, still daydreaming from time to time, but with less hope.
You’re using this old-fashioned editor called Vim. Sometimes you wish your editor could do something more for you. Deep inside, you start to feel like you could unleash some incredible power, if only you knew how to start…
If only… Nah! You remember those candid thoughts you had as a child. How deceptive they were. But now you know better, there are no such things as superpowers. Tweaking your editor has nothing to do with magic anyways, all you need to do is learning this weird language called vimscript, or VimL. You’re not even sure about the name, let alone writing any meaningful program with it. All you know is life is too short to bother. So you give up the idea.
Then the years go by…
And then, one day… One day, you hear about “Lisp”. You hear “Lisp” here, you hear “Lisp” there, “Lisp” “Lisp” “Lisp” “Lisp” everywhere (you need to whisper it in your head to get the effect). So slowly, bit by bit, you start reading about it, you try to understand what this is about. Your curiosity is awake. You get interested in what other people are doing with it. Then you start taking it a bit more seriously, you read SICP, then your mind explodes. You give it a go, and you discover the REPL. That’s it! You’re that kid again. You believe in superpowers, once again.
So you and your good old friend Vim are starting to feel alive again, you search around for the best tooling you can find to help you in your Lisp quest. You notice there are a few awesome people who went through the trouble of writing awesome tools with the awesome VimL, that enable you to write awesome code with an awesome Lisp. Deep inside you envy their courage, their dedication.
Along the way, you have a vague remembrance of something called “Neovim”. You decide to give it a go. Wow, so you can actually write neovim plugins in any language you want, since it exposes its API through RPC. Interesting, could you maybe, just maybe, write a plugin in a Lisp? And, what’s that? It also has a Lua runtime. This could come in handy as well, although it seems a bit remote from your current languages of interest. So you start nourishing the idea of writing some Lisp for Vim.
But your child dreams are a long way behind you. You don’t get over-excited. Until… Something unexpected happens…
You stumble across something called “Conjure”, written by the awesome Oliver Caldwell. He’s talking about a language, Fennel, that is a lisp which compiles to Lua. And he’s written a whole suite of tooling that makes writing fennel code for neovim a breeze. At least it appears so. You could definitely use that to write the tools you always wanted in your editor!
But there’s still an issue. All this stuff is way too clever for your little brain. It’s hard. So you decide to investigate, step by step, and before writing the tools you always wanted, you’ll write one that nobody will ever want. Why? Because it’s easier. Even you won’t use it, but it’ll teach you one thing or two.
This is how, you and me, we embark on this journey. Don’t mind me, I’m just this little voice whose going to mock your incompetence along the way. But that’s fine because I’m in the exact same situation as you. As you might guess, I’ve never written any vim plugin before. Nor have I written Fennel code. So don’t trust me too much…
Description of the plugin
Writing blog posts is long and cumbersome. We should automate it. Ok, maybe not entirely, but what we could do is having our editor suggest a list of synonyms for any word we’d like. What a cool idea.
So here’s what we’re going to do: a plugin that suggests synonyms.
Disclaimer: We’ll take many detours that will lead us astray, very far from the optimal route. There are many better ways to write such an overly simple plugin. But in order to comprehend things that seem too overwhelmingly complicated for me, I need to take detours. I need to fool around.
So, you are warned. This is not a “Learn X in Y” type of content. These are the logs of my thought process in my endeavor to understand an ecosystem. The resulting plugin is just a pretext, to have some material to play with.
Let’s get started
One of the thing we like the most about Lisp is the interactive way of working with our code. Oliver Caldwell wrote a nice post about that. This is exactly what we are going to try. We know we can rely on Conjure to eval our fennel code. We will get a mockup of the plugin in this way, evaluating our code in vim. We don’t want to bother with details such as packaging, yet. We want to be able to count on our runtime to provide us with the feedback we need, and build our program bit by bit, and just like this.
Conjure is here to help you doing exactly that. But Conjure is not a small thing. It is built around Aniseed, also made by Oliver Caldwell. Aniseed is a nice piece of software that will make our life much easier to write our plugin in Fennel. But I reckon that this is a lot to take in at once if, like me, you have no previous experience with this type of stuff.
So, we’ll try to deconstruct it. We’ll make the assumption that Conjure is installed and well configured (although it’s working out of the box), but we’ll look at things only as Conjure users. Although we’ll assume most of the time that we know nothing, I still suggest you take a little detour through the Conjure School, at least to get a feel for what Conjure can do for its users.
Getting familiar with Fennel inside Neovim
With just Conjure being installed, we can already start evaluating some fennel code on the fly.
Let’s verify that by writing the simplest piece of code we can think of in a new .fnl file:
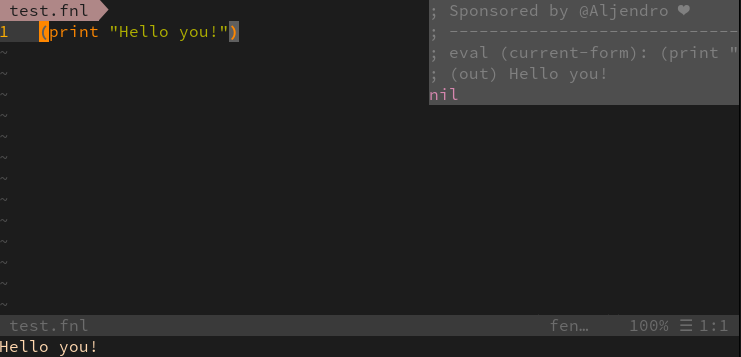
I just pressed \ee (see Conjure doc to learn the basics of using Conjure) on the form to eval, and hop! It appears to be working like a charm. Look, it even prints our text in vim’s message buffer at the bottom. We’re getting closer to hacking vim now!
Note: In commands such as \ee or \eb, I’ll assume \ is your <Leader> key as well, but of course, you’ll need to translate that should your configuration differ.
Cool, so now we’re going to write a fennel function. And we don’t want to change a winning team, so let’s just wrap our previous code, and try to evaluate that:
(fn hello [] (print "Hello you!"))
Now trying to evaluate that gives us this output from Conjure (using \er as a variant of \ee to make sure I’m evaluating the whole form. Again, the Conjure doc is quite good to see all key mappings):
; eval (root-form): (fn hello [] (print "Hello you!"))
#<function: 0x416b2d18>
Ok… It looks like this has been compiled correctly, and it’s returning me a function. What about we call the return value on the spot by surrounding our function definition with parenthesis?
(Notice the root-form being sent to conjure has an extra set of parenthesis, meaning we’re calling the function we’ve just defined)
; eval (root-form): ((fn hello [] (print "Hello you!")))
; (out) Hello you!
nil
Great so this is definitely working! We can see the expected output in the conjure logs, and we also saw “Hello you!” within the Vim’s message buffer. And of course, my function is returning nil because it’s just returning with the return value of print.
Now we’ll make it accept an argument, and try to call it with an arbitrary value.
(fn hello [name]
  (print (.. "Hello " name "!")))

(hello "Zozo")
Reading the Fennel documentation teaches us that the .. function is for concatenating strings.
If we try to eval, using \eb, our whole buffer, we get something like that in conjure’s log:
; eval (buf): /home/freddy/Dev/nvim/raw/test.fnl
; (out) Hello Zozo!
nil
Although if we try to eval the definition of the function and the call to that function separately, something weird happens:
; eval (current-form): (fn hello [name] (print (.. "Hello " name "!")...
#<function: 0x40c7e9e8>
; --------------------------------------------------------------------------------
; eval (current-form): (hello "Zozo")
; Compile error in /home/freddy/Dev/nvim/raw/test.fnl:2
;   unknown global in strict mode: hello
;
; * Try looking to see if there's a typo.
; * Try using the _G table instead, eg. _G.hello if you really want a global.
; * Try moving this code to somewhere that hello is in scope.
; * Try binding hello as a local in the scope of this code.
Let’s try to analyze what’s happening: unknown global in strict mode: hello. It’s as if our hello function didn’t belong to the scope where we invoke it.
Well, it kind of makes sense: when we evaluated our code, Conjure sent it to Fennel, who compiled our function and yielded it in one “compilation unit”. But that compilation unit didn’t persist anywhere. Then we’re trying to refer to that function in an other compilation unit, without providing any mean to fennel to locate or remember our previously defined function. Remember, we’re evaluating stuff on the fly, our code has no “location” from the fennel compiler perspective.
It seems that using this bare-minimal method of evaluating sporadically one form or another, we can’t go very far.
Ahead of Time (AOT) compilation
The easiest solution that I can think of is to work at a file level, and when we’re happy with the functions we’re writing in a particular fnl file, we can use the fennel compiler ourselves on the entire file. This will give us a .lua file that we can place in our vim path, and load it as a normal lua file.
This is what Fennel is calling Ahead of Time compilation.
That way, our code will have a location for fennel to use and refer to. We can then rely on lua’s require function to load our code.
One obvious benefit from this approach is that there won’t be any overhead to loading our code over what we’d be doing with normal Lua plugins.
Although this is a perfectly valid solution for distributing our code, we’re looking for something a bit more interactive, leveraging the quick feedback loop that conjure provides for us. If possible, we’d like to avoid having to recompile and reload a .lua file, because this is a bit too slow, so we’ll try to do better.
Leveraging Lua’s module system
The AOT compilation described above defines clear compilation units, the scope of the file we’re compiling.
This is a bit coarse, and compared to evaluating the whole buffer at once, like we did earlier with \eb, the only additional feature we are getting from this is the ability to load code from another compilation unit.
This is already not bad, but we want to do better. We want to be able to persist the result of our evaluations in such a way that we can eval bits and bobs here and there, interactively, to incrementally build our system.
What would be helpful to us is to have some kind of register somewhere, in which we could add/replace some variables or function definitions.
Of course, there is the Vim global scope itself. We can declare global vaiables in vim and store some values in there. But as far as I’m aware, we can’t store function definitions there.
An other option is the way Lua is looking up for existing code.
I won’t go into too much details there, mainly because I don’t know them myself, but naively put, Lua “modules” are simply associative tables that are loaded when some code call require.
The calling code is then responsible for keeping a ref to that table, usually in a local var, and search functions to call within that map. Surely, because Fennel compiles to Lua, it must be easy to use that mechanism in our plugin.
Here, two things are of particular importance to us.
-
The first one is that in order to avoid loading the same file twice,
requireeffectively maintains a global table. This table is calledpackage.loaded, and is essentially a mapping between a Lua module path, and the module content of that path (an other associative table). -
The second one is that tables are kept as mutable references. What this means is while the reference itself can be constant, the underlying table can change. So every client code looking up for a func or a var in that table might get a totally different thing depending on the time of the day! Although this feature might seem dangerous to someone caring a little bit for immutable data, this is something we can put to our benefit.
The first point gives us an answer to the fact that our code needs a place to live within the runtime.
The second point gives us an answer to the need of redefining stuff on the fly.
With these ingredients, we can stay within our runtime, and yet be able to interact with previously defined pieces of code (functions or values) without having to ever restart anything.
But there is still an issue: whenever we want to evaluate some code, we need to make sure it contains all the necessary information to perform the right lookups to our global table. Either to register itself to the right place, or to retrieve things that have been defined some time earlier.
So, we need some kind of abstract concept that would wrap every piece of code we evaluate inside a context, a namespace of some sort. Defining things should then be done within that context, as well as referring to other things should then be relative to that context.
Well… Guess what. Aniseed macros define exactly such an abstraction.
Everytime we evaluate something with Aniseed within Conjure, it is wraped in a “module”. There is a module macro, that allows us to define a context per file. Aniseed also provides a few macros to define new things, def or defn for example, which have the effect of registering our definition within the context of the module we’re writing.
There is no need to dig more in details about the way Aniseed does that, for our purpose. All we need to know is we got our backs covered to address the few organisational issues we saw while trying to define some code.
Aniseed provides much more than these module-related macros.
Its core module provides a set of functions inspired by Clojure, such as map, mapcat, assoc, get-in, etc.
There is a string module for a few String related utility functions,
a way to run some tests with test, but probably one of the most useful is a very small nvim module, that bridges to a lua-friendly neovim api. More on that later.
Using Aniseed and project (non-)setup
Now that we understand why we really want to use Aniseed to write our Fennel plugin, let’s see how we can use it in our plugin project. But first, a tiny little bit of setup.
We’ll call our plugin “More like that”. Because it will suggest more words, like that one.
It is important to have a directory structure that matches the names of the Aniseed modules that we will define. We’ll name our first module more-like-that.main, so we’re going to organize our code in a way that matches our module name.
mkdir more-like-that && cd more-like-that
mkdir -p fnl/more-like-that
The fnl/more-like-that/ directory will hold our code.
Let’s create our first file in there:
touch fln/more-like-that/main.fnl
Now let’s start editing it with our favourite editor (Neovim with Conjure installed being the only choice, thank you).
If you remember our plan from the beginning, we don’t want to bother with packaging, yet. So we’re going to take a shortcut, and install Aniseed directly in our vim runtimepath. Go to Aniseed repository and follow the installation steps.
I’m using vim-plug, so I’m adding that to my vim config, as instructed on the Readme for Aniseed.
Plug 'Olical/aniseed', { 'tag': 'v3.7.0' }
Plug 'bakpakin/fennel.vim'
When we’ll want to share our plugins to the world, we’ll need something more definitive. That is, shipping our own version of aniseed along with our plugin, so it is self contained as well as making sure our aniseed version doesn’t conflict with any other plugin. But let’s not bother with that yet. For now, we only want to get familiar with all this. Personally, I don’t like having to think of too many problems at once. And my biggest issue right now, is I have no idea what I’m doing, where I’m going.
So all we want for now, is being able to try and build our plugin code by just evaluating some forms on the fly, to try and figure out the overall direction of our work.
So here we are, inside our main.fnl file, and we’re going to write this :
;; Note that the module name we're defining matches the file structure
;; of our project.
(module more-like-that.main)

(defn hello [name]
  (print (.. "Hello, " name "!")))
Let’s pause for a bit. Here, we’re using two Aniseed macros, module and the defn. module defines a context in which further definitions will live. defn defines a function within that context.
We can eval the whole buffer to let the runtime know about our module and our function, with \eb.
Now that our vim knows about our function, we can evaluate this form on its own, within that module :
(hello "you")
Just pressing \ee on it, and we shall see our previously defined function being called and our message being printed.
; eval (current-form): (hello "you")
; (out) Hello, you!
nil
The way this works is that Conjure scans our buffer to find a module definition, and evaluates the form within the context of that module definition.
It seems that we’re having all the tools we need at our disposal. I don’t know you, but I’m pretty excited by this. Take a moment to realize: With nothing more than Conjure installed in our Vim, and a copy of Aniseed somewhere in our vim path, we can build a software inside the Vim runtime, with an incredibly tight feedback loop, without ever having to reload files or to restart anything. All we need is to eval some forms with Conjure. And in fact, putting Aniseed in our runtimepath isn’t strictly necessary in the previous example, since we’re not requiring any of its functions. We’re just using 2 macros that are always available in Conjure’s Aniseed client. I’m in love.
Interacting with vim
So, now that we’re starting to understand the tools we’re using, let’s actually think about our plugin.
We’re going to have some kind of synonyms provider. We’ll abstract that as a function that takes a word as a parameter, and return a list of new words or expressions, to suggest to the user.
The provider for such synonyms is to be decided yet, for now what is itching my brain is not that part, but the way we’ll display our suggestions.
I simply have no idea of how to do that with vim.
The kind of UI we want is similar to vim completion popup, I suppose. That is, a little popup list that opens next to the cursor location, let the user select something, and confirm the choice to replace the targeted word.
After reading a bit of the documentation in vim :h complete and :h completefunc, it seems to me that while this is probably perfectly suitable for our need, we won’t have much room to experiment, as the completefunc and omnifunc features in vim are pretty much made for text completion, triggered in insert mode, with a very specific way to register a very specific function.
Again, nothing wrong with that, but that will defeat the point of our exploration, I suppose. We’d have to focus straight away on VimL specific concerns if we were to go down that road.
We’ll have a bit more fun and we’ll use floating windows instead.
Let’s try to define a very simple function, to open a window in vim. It will take a position relative to the vim’s main window (a column number and a row number) as well as a size (width and height):
(defn open-window [col row width height] ...)
Hmmm. I simply have No Idea of what to put inside that function. Like I said, I have zero knowledge of Vim’s API.
By typing :h open and trying to complete in my vim command, I saw nvim_open_win.
This led me to a nice place in the Vim doc, :h api-floatwin, which gives away very valuable information.
Now I’ll let you read the documentation for that, as well as :h nvim_open_win, and :h nvim_create_buf, as the doc is self explanatory.
One piece of information we need is the how to access that from fennel. One way we can access the Lua api (fennel compiles to Lua, and have access to all Lua functions), is with things like:
(vim.api.nvim_create_buf ...)
We could be using this form of API calls to access Vim’s capabilities, but this will become very verbose and cumbersome for some of the capabilities that Vim exposes.
Instead, Aniseed expose a little Lua module aniseed.nvim which makes access to Vim’s API a bit more friendly to Lua users, and by extension, us, Fennel users.
In order to use this module, we’ll use Aniseed’s module loading system. Along with our module definition, we can include a require map:
(module more-like-that.main
  {require {nvim aniseed.nvim}})
What we’re doing here is loading the aniseed.nvim module and make it accessible through the locally defined table nvim. We could give it any name, but nvim is explicit.
We can now have a go at writing our window-opening function. Our first version will look something like that:
(defn make-window
  [col row width height]
  (let [buf (nvim.create_buf false true) ;; a non-listed, scratch buffer
       ;; defining a few options for my window:
        opts {:style "minimal"
              :relative "editor"
              :width width
              :height height
              :row row
              :col col}]
    ;; "wipe" seem to mean we get rid of the buffer when it's hidden,
    ;; as in, for real. No remain. I like that.
    (nvim.buf_set_option buf "bufhidden" "wipe")
    ;; This is the call to actually open the window
    (nvim.open_win buf true opts)))
I’m still not too sure about the options I chose. I’m still discovering all that, so I picked things that seemed to make sense from the documentation.
Now you can evaluate this function, using Conjure, and try to call it.
I encourage you to play with different options, to get familiar with them.
You can just re-evaluate your function whenever you change it, with \er for example, and play around with it.
This is me trying different positions and size for my window:
Here, you can start to get a feel of what it’s like to be able to evaluate code on the fly, and see the result immediately.
Filling our window with some lines
Now that we have an idea of how we can display a little floating window on the screen, let’s focus on its content.
We’ll change our code a bit to make it easier to express the different stages of configuration of our buffer. Displaying the buffer in a window being the last stage our buffer will have to go through.
Schematically, we can anticipate our buffer creation will look like a sequence of the following steps, maybe:
Buffer Instance -> Content writing -> Keymap configuration -> Display in window
I am choosing this perspective because this is how I perceive things.
We’ll express our view with the threading macro -> in Fennel.
One benefit of this approach is that it will make it easy for us to write each stage as a separate function, which means it will also be easy to try different combinations of these stages. This fits very well with the kind of interactive workflow that we want.
So to leverage that, we’ll make each function of our pipeline to take a buffer as its first argument, and return the same buffer.
We’ll rewrite our make-window function so it looks like this:
(defn make-window
  [buf col row width height]
  (let [opts {:style "minimal"
              :relative "editor"
              :width width
              :height height
              :row row
              :col col}
        win (nvim.open_win buf true opts)]
    (nvim.buf_set_option buf "modifiable" false)
    (nvim.win_set_option win "cursorline" true)))
The main change here is I’ve put away the creation of the buffer, and we’re now accepting the buffer as our first argument.
Also, we added a cursorline option to our window, to highlight the line the cursor is currently on, as well as setting the modifiable option to false in the buffer.
Since we know this will be the last stage in our buffer initialization pipeline, there’s no need to return the buffer at the end.
Then we’re going to wrap our buffer creation in its own function, and pass its result to make-window, like so:
(module more-like-that.main
{require {nvim aniseed.nvim}})
(defn create-suggestion-buffer []
(let [buf (nvim.create_buf false true)]
(nvim.buf_set_option buf "bufhidden" "wipe")
buf))
(defn make-window
[buf col row width height]
(let [opts {:style "minimal"
:relative "editor"
:width width
:height height
:row row
:col col}
win (nvim.open_win buf true opts)]
(nvim.buf_set_option buf "modifiable" false)
(nvim.win_set_option win "cursorline" true)))
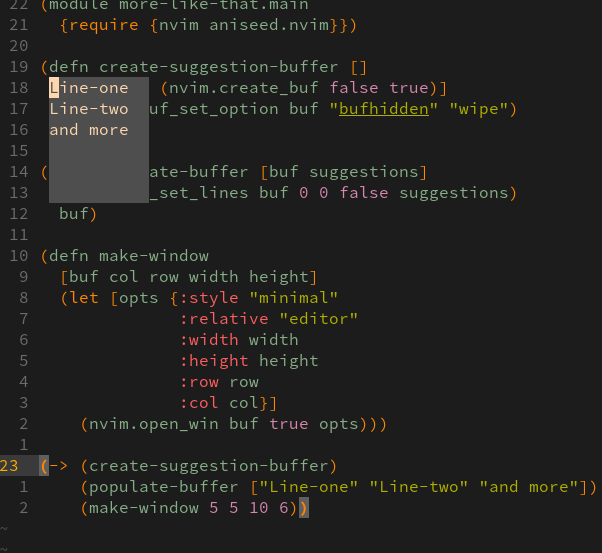
(-> (create-suggestion-buffer)
(make-window 5 5 10 6))
If we evaluate the entire buffer at once with \eb, our threading macro will be executed and we’ll see our little window in the top-left corner of our screen.
Now let’s write a function that puts some content in our buffer. We’re going to use the nvim_buf_set_lines() function.
According to the doc, we pass it a line number twice, some boolean, and an array of lines, and it does the job.
Here’s our function for now:
(defn populate-buffer [buf suggestions]
  (nvim.buf_set_lines buf 0 0 false suggestions)
  buf)
That we’re plugging into our pipeline like so:
(-> (create-suggestion-buffer)
    (populate-buffer ["Line-one" "Line-two" "and more"])
    (make-window 5 5 10 6))
Now we can evaluate both our new function and our threading macro, which gives us something like:
(Note: you can close this little window by simply doing :q, as any other normal window)
One thing we can improve straight away, is to make the height of our window match the number of entries to suggest.
(let [suggestions ["Line-one" "Line-two" "and more"]]
  (-> (create-suggestion-buffer)
      (populate-buffer suggestions)
      (make-window 5 5 10 (length suggestions))))
Also, we want to make sure that our window is wide enough to let the longest entry fit.
We want a way to know the maximum length given a list of entries. Let’s write a little function to do that.
We’ll use the useful aniseed.core module that we’ll add to our module definition:
(module more-like-that.main
  {require {nvim aniseed.nvim
            a aniseed.core}})
Because in there, there are a few function that I’d really like to use, such as map.
Here’s a little clip showing how I experiment a bit to get the function I want:
As you can see, having such an instant feedback on the code you’re writing is very comfortable. This is a short demo on a very simple function, but I will work in this way for almost the entirety of the code I’m going to write.
Anyways, let’s look at our new buffer initialization:
(defn max-len [entries]
  (nvim.fn.max (a.map a.count entries)))

(let [suggestions ["Line-one" "Line-two" "and more"]]
  (-> (create-suggestion-buffer)
      (populate-buffer suggestions)
      (make-window 5 5 (max-len suggestions) (length suggestions))))
The resulting window seemed a little too narrow to me, so I decided to leave one blank column on each side of my window:
(defn prefix-space [word]
  (.. " " word))

(defn populate-buffer [buf suggestions]
  (nvim.buf_set_lines buf 0 0 false (a.map prefix-space suggestions))
  buf)

(let [suggestions ["Line-one" "Line-two" "and more"]
      width (+ 2 (max-len suggestions))  ;; we leave space for 2 spaces
      height (length suggestions)]
  (-> (create-suggestion-buffer)
      (populate-buffer suggestions)
      (make-window 5 5 width height)))
Implement word remplacement
Our plugin will allow the user to select a word from the list of suggestions, and when he confirms his choice, we want to replace the word under the cursor by the entry he selected.
Let’s implement that replacement bit with a function such as :
(defn replace-word [replacement] ...)
This sounds exactly like the type of thing I’m doing everyday on my Vim. I type ciw and type in the replacement word.
Why not doing it like that then?
(defn replace-word [replacement]
  "Replace the word under the cursor with `replacement`"
  (nvim.command (.. "normal ciw" replacement)))
See :h :normal to get the details, but briefly, this is a way to tell vim “Execute that sequence of key strokes as if I typed them in normal mode”.
Implement word reading
Also, in order to suggest the right synonyms, we’ll need to know the word under the cursor.
Vim has a special expression for that, <cword>, that we can expand using the expand() vim’s function:
(defn read-word []
  "Return the word under the cursor"
  (nvim.fn.expand "<cword>"))
That was an easy one.
Key mappings inside our little window
Now that we have a window with a buffer, we’d like to limit the amount of things the user can do inside.
The kind of actions we want to allow are:
- move the cursor up and down
- confirm the selection
- cancel (exit suggestions window)
Let’s see how we can define the correct key mappings for these actions.
The way we define mappings in Vim is with a flavour of the general map function.
Such as nmap for normal modes mapping, imap for insert mode mappings, etc.
This map function is taking a “Left Hand Side” key combination, and a “Right Hand Side” one, in such a way that someone typing the LHS keys in a sequence becomes equivalent of typing the RHS sequence instead.
The function nvim_buf_set_keymap is available to us to define such mappings for a particular buffer.
This is a tricky bit, because it will involve a lot of string manipulation. Especially for writing the RHS bit, because in our case, this RHS key combination involves calling our Fennel functions.
The way to call a lua function from vim is by typing something like :lua theFunction().
But we need to locate our code and require it before being able to call it.
So the type of strings we want to associate to our mapping would look like something like that:
:lua require('our.module')['our-function']()
Let’s define a little helper to craft such a string.
We’ll use aniseed.string’s join function to join together the arguments with a ,, so we need to amend our module definition:
(module more-like-that.main
  {require {nvim aniseed.nvim
            a aniseed.core
            str aniseed.string}})
And here’s our helper function:
(defn lua-call [mod function ...]
  "expand to a lua function call for `function` inside `module`"
  (let [astr (str.join ", " [...])]
    (.. "lua require('" mod "')['" function "'](" astr ")")))
When invoked like:
(lua-call :more-like-that.main :some-function 1 2 3)
We’re getting this type of string back:
"lua require('more-like-that.main')['some-function'](1, 2, 3)"
Now at the top of our module we can do something like:
(def this :more-like-that.main)
So we just have to use this whenever we need to use our module name.
With this little tool in place, we can define a list of mappings to setup for our buffer, like so:
(defn install-popup-mappings [buf]
  "Setup mappings for suggestion popup buffer"
  (let [mapping {"<C-n>" [:move-selection 1]
                 "<C-p>" [:move-selection -1]
                 "k" [:move-selection -1]
                 "j" [:move-selection 1]
                 "q" [:cancel-suggestion]
                 "<Esc>" [:cancel-suggestion]
                 "<CR>"  [:confirm-selection]}]
    (each [key args (pairs mapping)]
      (nvim.buf_set_keymap
        buf :n
        key (.. ":" (lua-call this (unpack args)) "<CR>")
        {:noremap true
         :silent true})))
  buf)
This is quite verbose, but all we’re doing is iterating over a mapping table, and declaring mappings using buf_set_keymap for each one of them, with the help of our little helper function lua-call.
The noremap and silent options are described in the doc of vim.
Also, we made sure to return the buf at the end, so we can use install-popup-mappings in our buffer initialization pipeline.
Of course, our mapping are currently referring to non-existing functions.
Let’s see how we can go about implementing them.
The easiest one, cancellation, is just a alias to :q.
(defn cancel-suggestion []
  (nvim.ex.q))
Confirming the current selection is simply a matter of reading the line under the cursor, trimming it so we don’t get the extra spaces,
and calling our already existing replace-word with that trimmed line (ah, and calling :q to close the suggestion window).
(defn confirm-selection []
  (let [line (nvim.fn.getline ".")
        word (str.trim line)]
    (nvim.ex.q)
    (replace-word word)))
The trickiest one in that list is moving the cursor up and down, because we want to limit its range of motion.
This is done using math.min and math.max.
(defn move-selection [offset]
  (let [[row col] (nvim.win_get_cursor 0)
        row (if (> offset 0)
              (math.min (+ offset row) (- (nvim.fn.line "$") 1))
              (math.max (+ offset row) 1))]
    (nvim.win_set_cursor 0 [row col])))
Here, (nvim.win_get_cursor 0) gives us the position of the cursor in the current window, and (nvim.fn.line "$") gives me the number of the last line in the buffer.
Finally, nvim.win_set_cursor sets the position of the cursor.
One last detail, we’d like disable all other keys from that buffer.
Here’s a hacky way of doing it:
(defn disable-keys [buf]
  "Disable all letters mappings"
  (each [_ c (ipairs [:a :b :c :d :e :f :g :h :i :j :k :l :m
                      :n :o :p :q :r :s :t :u :v :w :x :y :z])]
    (nvim.buf_set_keymap buf :n (.. "<C-" c ">") "<Nop>" {:silent true})
    (nvim.buf_set_keymap buf :n (: c :upper) "<Nop>" {:silent true})
    (nvim.buf_set_keymap buf :n c "<Nop>" {:silent true}))
  buf)
We are iterating over all letters, and for each of them, like say k, we’re mapping k, K, and <c-k> to a no-op.
Forgive the sacrilege please, I don’t know how else I can do it…
After adding the disable-keys and install-popup-mappings functions to the pipeline, let’s review our entire code so far:
(module more-like-that.main
  {require {nvim aniseed.nvim
            str aniseed.string
            a aniseed.core}})

(def this :more-like-that.main)

(defn create-suggestion-buffer []
  (let [buf (nvim.create_buf false true)]
    (nvim.buf_set_option buf "bufhidden" "wipe")
    buf))

(defn make-window
  [buf col row width height]
  (let [opts {:style "minimal"
              :relative "editor"
              :width width
              :height height
              :row row
              :col col}
        win (nvim.open_win buf true opts)]
    (nvim.buf_set_option buf "modifiable" false)
    (nvim.win_set_option win "cursorline" true)))

(defn max-len [entries]
  (nvim.fn.max (a.map a.count entries)))

(defn prefix-space [word]
  (.. " " word))

(defn populate-buffer [buf suggestions]
  (nvim.buf_set_lines buf 0 0 false (a.map prefix-space suggestions))
  buf)

(defn read-word []
  "Return the word under the cursor"
  (nvim.fn.expand "<cword>"))

(defn replace-word [replacement]
  "Replace the word under the cursor with `replacement`"
  (nvim.command (.. "normal ciw" replacement)))

(defn lua-call [mod function ...]
  "expand to a lua function call for `function` inside `module`"
  (let [astr (str.join ", " [...])]
    (.. "lua require('" mod "')['" function "'](" astr ")")))

(defn cancel-suggestion []
  (nvim.ex.q))

(defn confirm-selection []
  (let [line (nvim.fn.getline ".")
        word (str.trim line)]
    (nvim.ex.q)
    (replace-word word)))

(defn move-selection [offset]
  (let [[row col] (nvim.win_get_cursor 0)
        row (if (> offset 0)
              (math.min (+ offset row) (- (nvim.fn.line "$") 1))
              (math.max (+ offset row) 1))]
    (nvim.win_set_cursor 0 [row col])))

(defn disable-keys [buf]
  "Disable all letters mappings"
  (each [_ c (ipairs [:a :b :c :d :e :f :g :h :i :j :k :l :m
                      :n :o :p :q :r :s :t :u :v :w :x :y :z])]
    (nvim.buf_set_keymap buf :n (.. "<C-" c ">") "<Nop>" {:silent true})
    (nvim.buf_set_keymap buf :n (: c :upper) "<Nop>" {:silent true})
    (nvim.buf_set_keymap buf :n c "<Nop>" {:silent true}))
  buf)

(defn install-popup-mappings [buf]
  "Setup mappings for suggestion popup buffer"
  (let [mapping {"<C-n>" [:move-selection 1]
                 "<C-p>" [:move-selection -1]
                 "k" [:move-selection -1]
                 "j" [:move-selection 1]
                 "q" [:cancel-suggestion]
                 "<Esc>" [:cancel-suggestion]
                 "<CR>"  [:confirm-selection]}]
    (each [key args (pairs mapping)]
      (nvim.buf_set_keymap
        buf :n
        key (.. ":" (lua-call this (unpack args)) "<CR>")
        {:noremap true
         :silent true})))
  buf)

(let [suggestions ["Line-one" "Line-two" "and more"]
      width (+ 2 (max-len suggestions))
      height (length suggestions)]
  (-> (create-suggestion-buffer)
      (populate-buffer suggestions)
      (disable-keys) ; first disable all keys
      (install-popup-mappings) ; then enable the ones we want
      (make-window 5 5 width height)))
That should wrap up the UX side of things.
Retrieving an actual list of synonyms
Now that we are happy with the behaviour of our tiny window, we can finally focus on putting some real content in there.
I looked around for databases of synonyms to download, but couldn’t find any. Instead, I found a nice HTTP api that does exactly what I need.
A little read of :h http should give me pointers on how to consume this type of content.
Turns out the easiest way is to load the content of the URL into a buffer. I’ll do that with sview, that will momentarily split the current window and load the content of the url into a new buffer.
From there, I’ll use the json_decode() function to parse the content of the buffer, before deleting our temporary buffer.
Here’s our function:
(defn http-get [url]
  (nvim.ex.sview url)
  (let [content (nvim.fn.getline 1 "$")]
    (nvim.ex.bd)
    (nvim.fn.json_decode content)))
Now I can write a get-synonyms function that will call the API url with any word we want, and return a list of resulting words:
(defn get-synonyms [w]
  (let [url (..  "https://api.datamuse.com/words?rel_syn=" w)
        res (a.map (fn [e] (. e :word)) (http-get url))]
    (table.insert res 1 w)
    res))
Notice I’ve taken the liberty to add the original word at the front of the list. I figured it would help the user to contextualize a bit.
Now the only thing we need is to replace our stub list with a call to the get-synonyms function.
(let [suggestions (get-synonyms (read-word))
      width (+ 2 (max-len suggestions))
      height (length suggestions)]
  (-> (create-suggestion-buffer)
      (populate-buffer suggestions)
      (disable-keys) ; first disable all keys
      (install-popup-mappings) ; then enable the ones we want
      (make-window 5 5 width height)))
Minor improvements
Right now, our popup window pops up at always the same place. It would be nice if, instead, its position was relative to the position of the cursor.
We’ll remove the col and row arguments of our make-window function,
and change the :relative option value to cursor,
so we open the window relatively to our cursor position.
Also, in order to expose our plugin to Vim, we’ll define a Command,
:MLTSynonyms, that will trigger the code wrapped in the final let.
Later, maybe, we could add :MLTRhymes? It seems the HTTP service we’re using supports it.
We’ll first put that big let form in a function:
(defn activate []
  (let [suggestions (get-synonyms (read-word))
        width (+ 2 (max-len suggestions))
        height (length suggestions)]
    (-> (create-suggestion-buffer)
        (populate-buffer suggestions)
        (disable-keys) ; first disable all keys
        (install-popup-mappings) ; then enable the ones we want
        (make-window width height))))
Now we want to define a custom command, we’ll do this in an init function,
that we’ll make Vim call when it will later load our plugin.
(defn init []
  (nvim.ex.command_ "MLTSynonyms" (lua-call this :activate)))
The command_ is the name our nvim module uses to expose :command!.
We give our command the name “MLTSynonyms”, and its replacement text is the lua invokation of our activate function.
Tip: just evaluating the declaration of the command should register our command in your running instance of Vim. You can verify that by then typing the vim command :MLT and to a tab completion to ensure it’s here. If you do that while being on an interesting word, you should even be able to replace it with a synonym!
So our plugin is working.
Let’s review one more time the entire code:
(module more-like-that.main
  {require {nvim aniseed.nvim
            str aniseed.string
            a aniseed.core}})

(def this :more-like-that.main)

(defn http-get [url]
  (nvim.ex.sview url)
  (let [content (nvim.fn.getline 1 "$")]
    (nvim.ex.bd)
    (nvim.fn.json_decode content)))

(defn get-synonyms [w]
  (let [url (..  "https://api.datamuse.com/words?rel_syn=" w)
        res (a.map (fn [e] (. e :word)) (http-get url))]
    (table.insert res 1 w)
    res))

(defn create-suggestion-buffer []
  (let [buf (nvim.create_buf false true)]
    (nvim.buf_set_option buf "bufhidden" "wipe")
    buf))

(defn make-window
  [buf width height]
  (let [opts {:style "minimal"
              :relative "cursor"
              :width width
              :height height
              :row 1
              :col -1}
        win (nvim.open_win buf true opts)]
    (nvim.buf_set_option buf "modifiable" false)
    (nvim.win_set_option win "cursorline" true)))

(defn max-len [entries]
  (nvim.fn.max (a.map a.count entries)))

(defn prefix-space [word]
  (.. " " word))

(defn populate-buffer [buf suggestions]
  (nvim.buf_set_lines buf 0 0 false (a.map prefix-space suggestions))
  buf)

(defn read-word []
  "Return the word under the cursor"
  (nvim.fn.expand "<cword>"))

(defn replace-word [replacement]
  "Replace the word under the cursor with `replacement`"
  (nvim.command (.. "normal ciw" replacement)))

(defn lua-call [mod function ...]
  "expand to a lua function call for `function` inside `module`"
  (let [astr (str.join ", " [...])]
    (.. "lua require('" mod "')['" function "'](" astr ")")))

(defn cancel-suggestion []
  (nvim.ex.q))

(defn confirm-selection []
  (let [line (nvim.fn.getline ".")
        word (str.trim line)]
    (nvim.ex.q)
    (replace-word word)))

(defn move-selection [offset]
  (let [[row col] (nvim.win_get_cursor 0)
        row (if (> offset 0)
              (math.min (+ offset row) (- (nvim.fn.line "$") 1))
              (math.max (+ offset row) 1))]
    (nvim.win_set_cursor 0 [row col])))

(defn disable-keys [buf]
  "Disable all letters mappings"
  (each [_ c (ipairs [:a :b :c :d :e :f :g :h :i :j :k :l :m
                      :n :o :p :q :r :s :t :u :v :w :x :y :z])]
    (nvim.buf_set_keymap buf :n (.. "<C-" c ">") "<Nop>" {:silent true})
    (nvim.buf_set_keymap buf :n (: c :upper) "<Nop>" {:silent true})
    (nvim.buf_set_keymap buf :n c "<Nop>" {:silent true}))
  buf)

(defn install-popup-mappings [buf]
  "Setup mappings for suggestion popup buffer"
  (let [mapping {"<C-n>" [:move-selection 1]
                 "<C-p>" [:move-selection -1]
                 "k" [:move-selection -1]
                 "j" [:move-selection 1]
                 "q" [:cancel-suggestion]
                 "<Esc>" [:cancel-suggestion]
                 "<CR>"  [:confirm-selection]}]
    (each [key args (pairs mapping)]
      (nvim.buf_set_keymap
        buf :n
        key (.. ":" (lua-call this (unpack args)) "<CR>")
        {:noremap true
         :silent true})))
  buf)

(defn activate []
  (let [suggestions (get-synonyms (read-word))
        width (+ 2 (max-len suggestions))
        height (length suggestions)]
    (-> (create-suggestion-buffer)
        (populate-buffer suggestions)
        (disable-keys) ; first disable all keys
        (install-popup-mappings) ; then enable the ones we want
        (make-window width height))))

(defn init []
  (nvim.ex.command_ "MLTSynonyms" (lua-call this :activate)))
Wrapping things up
If you pause for a moment now, you’ll realise we never actually installed our plugin anywhere. We developped it against a running instance of Vim, by evaluating functions and forms on the fly thanks to Conjure/Aniseed.
If you restart your vim now, it won’t remember any of that. We need to properly package it in a way so our users can use their favourite Vim plugin manager to install our work, so it is loaded into their vim when they start their editor.
In order to do that, one method is to use the Ahead of Time compilation technique we saw earlier, so that our users don’t need to re-compile our code everytime it is loaded. Instead, we’ll ship our plugin in such a way that what the user loads are our precompiled lua files.
It is also better for us to ship our own copy of aniseed. That way, we won’t clash with any other plugin that might require a different version of it.
The easiest way to go about this is probably to use Oliver Caldwell’s seed.sh script, that he kindly prepared for us to use.
In general, it is advised to use it in an empty repository, as it might override a few files that you’d rather keep intact. But in our case, it is fine to use it in our project folder, which only contains One file for now.
We’ll simply run this command in our directory:
curl -fL https://raw.githubusercontent.com/Olical/aniseed/master/scripts/seed.sh | sh
This pulls a lot of things in our repository. A bit too much to my taste. So we’ll clean a few things before going further:
# First, we don't need a copy of the whole Aniseed project history, not its github config
rm -rfv deps/aniseed/.git*
# We don't need aniseed's seed, tests, or fnl files
rm -rfv deps/aniseed/{seed,test,fnl}
# we also don't need the example modules, not the tests
find -type d -name example -exec rm -rfv {} \;
rm -rvf test
We’ll remove the deps target from the Makefile, as well as the test because we don’t have any test.
Then we’ll rename plugin/example.vim to plugin/mlt.vim,
and replace its content with this instead:
if has("nvim")
  lua require("more-like-that.main").init()
endif
As a final step, we need to “embed” aniseed into our project path, because we depend on it at runtime.
So we’ll follow the advice in the Makefile and uncomment the embedding part.
Our Makefile now looks like that:
.PHONY: compile

default: compile

compile:
        rm -rf lua
        deps/aniseed/scripts/compile.sh
        deps/aniseed/scripts/embed.sh aniseed more-like-that
But we also need to ensure we’re using our embedded version of aniseed in our module.
So we’ll amend our module declaration in our main.fnl file, so it looks like that:
(module more-like-that.main
  {require {nvim more-like-that.aniseed.nvim
            str more-like-that.aniseed.string
            a more-like-that.aniseed.core}})
We can now run make to compile everything to Lua.
Now in order to test all this, we’ll make our plugin manager point to our installation by adding:
Plug 'hpointu/mlt.nvim' , {'dir': '~/Dev/nvim/more-like-that'}
to our vim config, so we point to our local directory.
Open a new vim instance to edit a text file, and try the command :MLTSynonyms.
You can find the repository for the plugin Here